我的家庭网络设置
(主)路由器
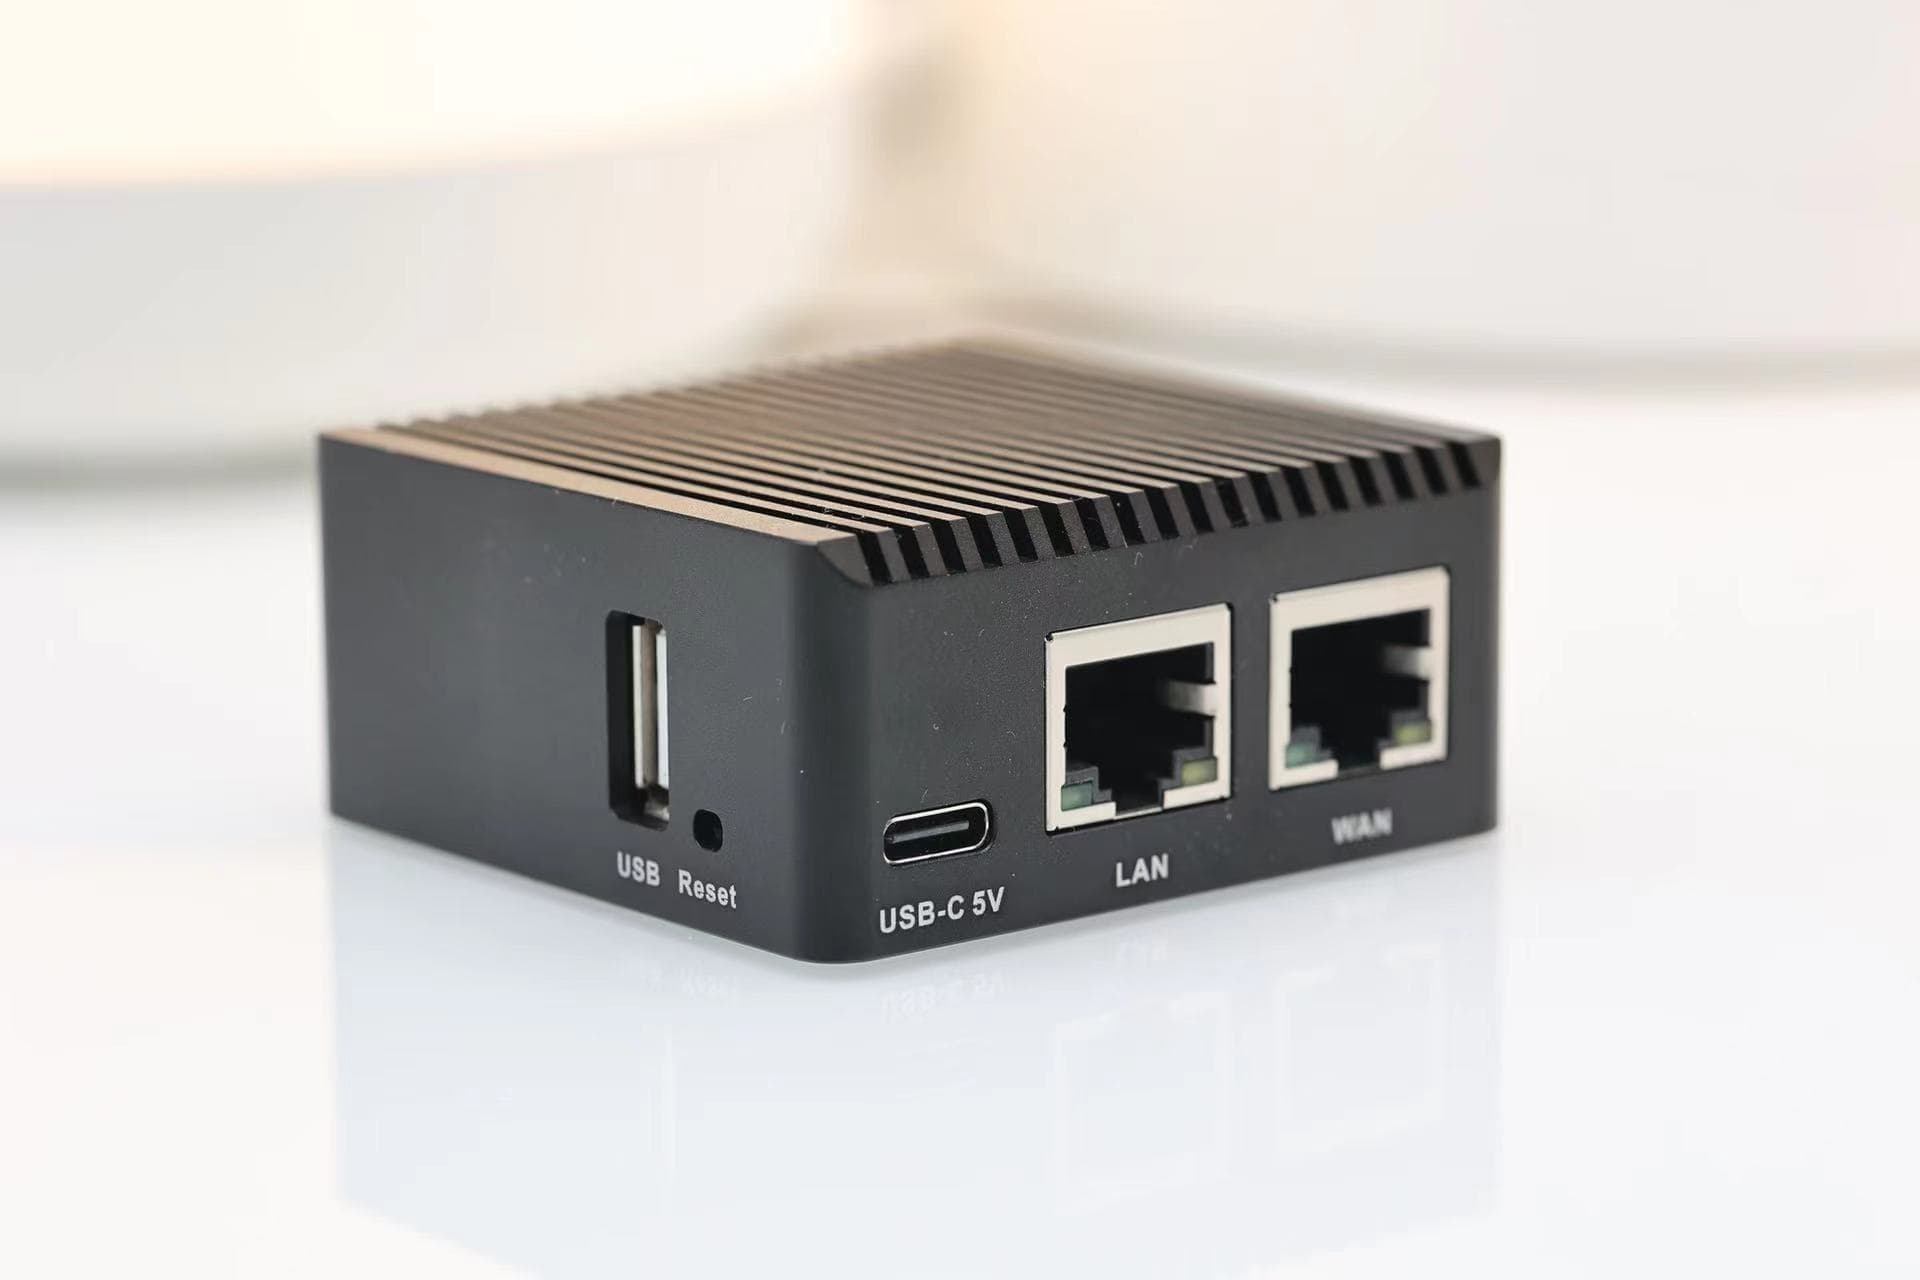
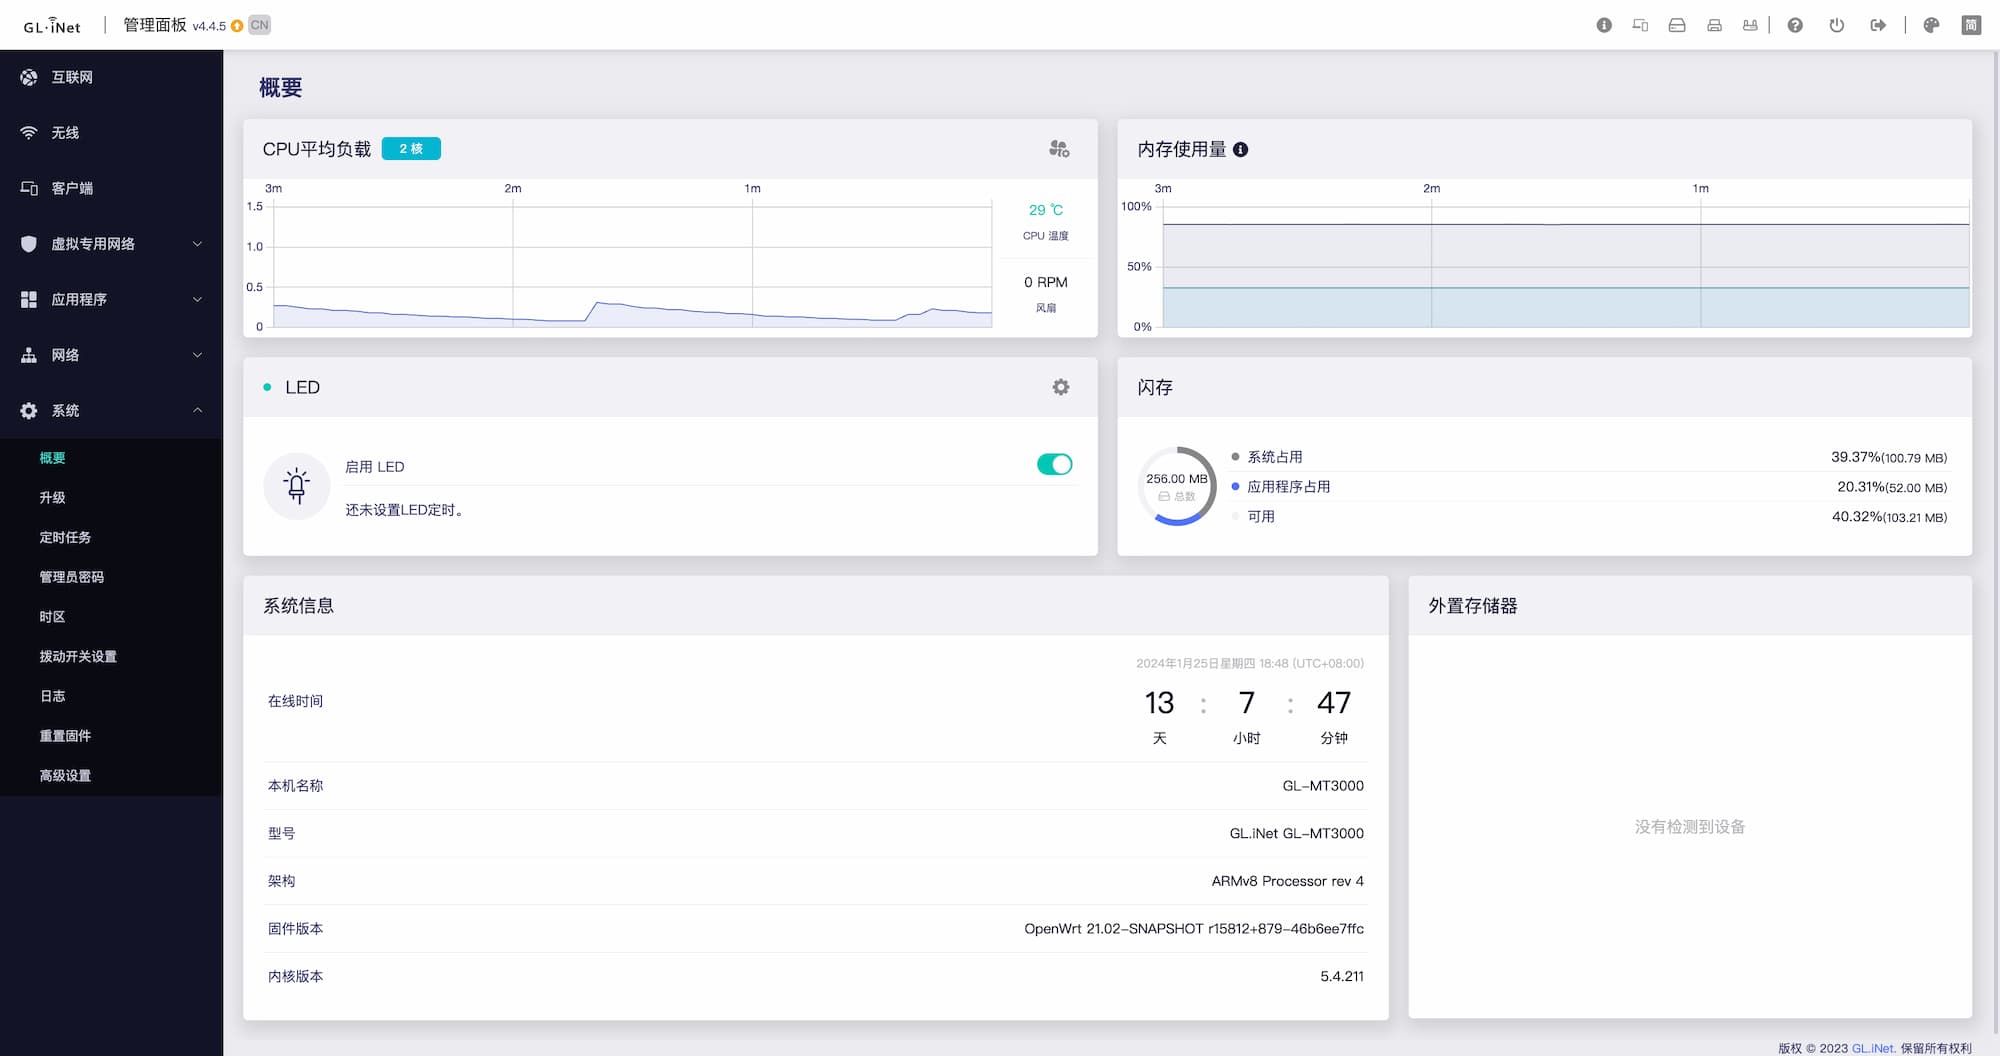
我用的是 GLiNet MT3000。
优点嘛:
- 官方固件基于 OpenWRT
- 体积很小,功耗很低,温度也不高
- 支持 WiFi 6
- 还算不错的 256MB RAM + 512MB ROM,简单地运行几个软件很够用
- 稳定
缺点:
- 价格偏贵了点,同配置 100+ 元就可以买到其他品牌的路由器
- 信号无法覆盖大面积户型
折腾
如果购买的是国行,到手先解锁。解锁后可以使用固件自带的:VPN、Adguard Home、Tailscale 等软件功能。
可以参考这里进行解锁
软件包源
1 | src/gz custom https://op.dllkids.xyz/packages/aarch64_cortex-a53/ |
如果安装某软件缺少软件包可以继续新增官方的源:
1 | src/gz base http://glinet.83970255.xyz/?f=/mt7981/base |
安装 iStore 软件商店
下载 https://istore.linkease.com/repo/all/store/ 内的 4 个
.ipkhttps://istore.linkease.com/repo/all/store/ 1
2
3
4luci-app-store_0.1.14-2_all.ipk 11-Oct-2023 18:47 95351
luci-lib-taskd_1.0.18_all.ipk 16-Aug-2023 23:05 6949
luci-lib-xterm_4.18.0_all.ipk 20-Jul-2022 15:08 78104
taskd_1.0.3-1_all.ipk 18-Jul-2022 17:56 2401下载完成以后按照如下顺序,在 Luci 界面中的 系统-软件包-上传软件包… 安装
顺序 软件包 1 taskd_1.0.3-1_all.ipk 2 luci-lib-xterm_4.18.0_all.ipk 3 luci-lib-taskd_1.0.18_all.ipk 4 luci-app-store_0.1.14-1_all.ipk 安装完成以后刷新页面,就可以看到 iStore 菜单
DNS 分流
安装 SmartDNS
在 iStore 中安装 SmartDNS。
设置两组 DNS 服务器
选项 值 启用 服务器名称 本地端口 TCP 服务器 IPV6 服务器 双栈 IP 优选 域名预加载 缓存过期服务 重定向 缓存大小 域名 TTL 域名 TTL 最小值 域名 TTL 最大值 第二 DNS 服务器
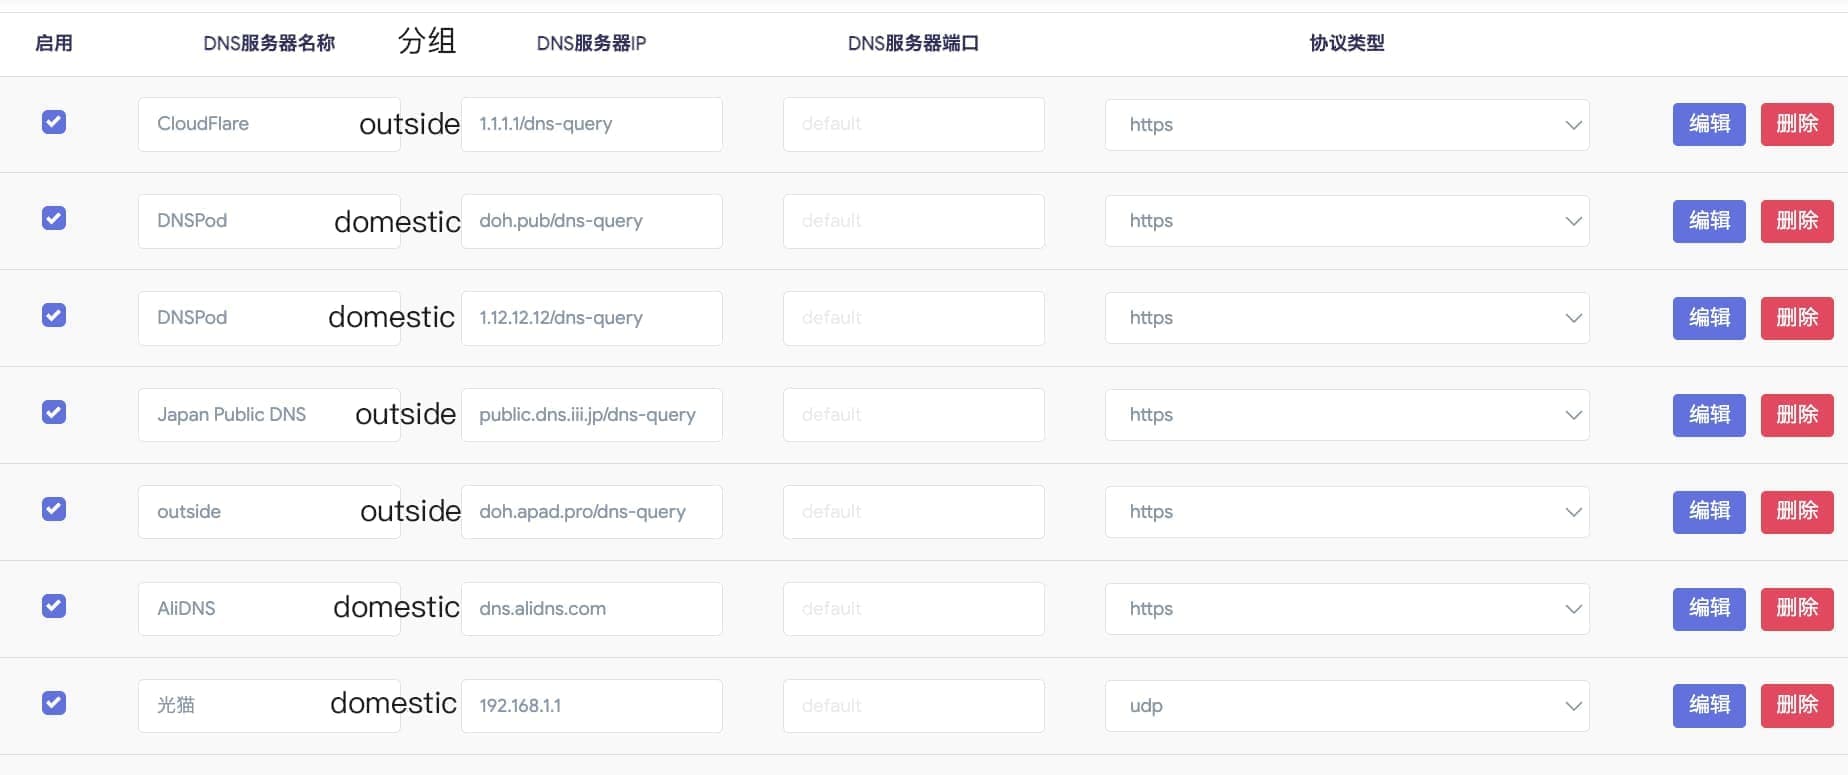
选项 值 启用 本地端口 TCP 服务器 服务器组 跳过测速 跳过 address 规则 跳过 Nameserver 规则 跳过 ipset 规则 跳过 address SOA(#)规则 跳过双栈优选 跳过 cache 停用 IPV6 地址解析 上游服务器同样设置两组多个。 使用 DNSPod、以及上级路由(光猫)作为 domestic 组,CloudFlare、Google 作为 outside
组。我个人优先选择 DoH(DNS over HTTPS)。可以参考我的:
指定 SmartDNS 为上游 DNS
例如某软件 的 DNS 设置
NameServer
序号 启用 服务器分组 服务器地址 服务器端口 服务器类型 1 NameServer 127.0.0.1 5335 udp FallBack
序号 启用 服务器分组 服务器地址 服务器端口 服务器类型 1 FallBack 127.0.0.1 6553 udp Default-NameServer
序号 启用 服务器分组 服务器地址 服务器端口 服务器类型 1 Default-NameServer 127.0.0.1 5335 udp OK,到此就设置完成了。
检查效果
Luci-网络-网络诊断
在 网络工具里面 进行 Nslookup,应该只返回如下一组结果:
nslookup openwrt.org 1
2
3
4
5
6Server: 127.0.0.1
Address: 127.0.0.1#53
Name: openwrt.org
Address 1: 64.226.122.113
*** Can't find openwrt.org: No answer
端口转发
在 GLiNet 后台-网络-防火墙 设置端口转发规则,再开放路由器相关端口,完成。
测试 NAT 类型
DDDD. 在一些点对点通信比如游戏、语音中可能需要用到 Full-cone 类型 NAT。
Windows 电脑可以使用 NatTypeTester 进行测试。
下列教程适用 MacOS/Linux
安装 nami
安装 stuntman
shell 1
nami install stuntman
测试
shell 1
stunclient stun.voipbuster.com --mode behavior
连不通的话尝试下面几个服务器
1
2
3
4
5
6stun.voipbuster.com
stun.sipgate.net
stun.voipbuster.com
stun.voipstunt.com
stun.callwithus.com
stun.internetcalls.com结果如下:
shell 1
2
3
4
5
6
7stunclient stun.voipbuster.com --mode behavior
Binding test: success
Local address: 192.168.8.176:56597
Mapped address: 222.222.222.222:56597
Behavior test: success
Nat behavior: Endpoint Independent Mapping重点看 Nat behavior
类型 值 Full-cone Endpoint Independent Symmetric Address-Dependent
Address and Port-Dependent
中兴 F450G 电信光猫
超级密码
- 打开 http://192.168.1.1/ 使用光猫机身贴纸上的 useradmin 账户登录
- 登录以后页面 URL 为:http://192.168.1.1/main.html
- 地址栏输入:http://192.168.1.1/main.html/backupsettings.conf 会下载这个 conf 文件,不行的话试试 http://192.168.1.1/backupsettings.conf
- 超级管理员账号为在 AdminUserName,一般为:telecomadmin,密码在 X_CT-COM_TeleComAccount,每台设备不同。
- 拿到超级管理员账号密码以后就可以回到 http://192.168.1.1/ 使用它进入管理员后台
开启 DMZ
中兴 F450G 的 DMZ 菜单在:应用-高级 NAT 设置-DMZ 配置 中打开。
填入路由器的 IP 保存即可。
PS. 电信家宽竟然是直接给的公网 IP,6。
没有更多了。